Oyster mushroom cultivation guide is one of the most searched topics today—and for a good reason. If you’re looking for a low-cost, easy-to-start, and profitable farming option, oyster mushrooms are one of the best choices available, especially for beginners.
Unlike traditional farming, oyster mushroom cultivation doesn’t require large land, heavy investment, or complex techniques. You can start growing them at home using a small room, balcony, or any unused indoor space. With the right setup, you can harvest fresh mushrooms within just 20–25 days, making it one of the fastest-growing crops.
What makes oyster mushrooms even more attractive is their high demand in local markets, restaurants, and health-conscious households. They are rich in protein, vitamins, and antioxidants, which continues to drive their popularity across India.
But here’s the key—success in mushroom farming is not about just starting, it’s about following the right method. In this complete oyster mushroom cultivation guide, you’ll learn step-by-step how to grow oyster mushrooms, the materials required, ideal conditions, common mistakes to avoid, and tips to maximize your yield—even if you’re starting for the first time.
What is Oyster Mushroom Cultivation?
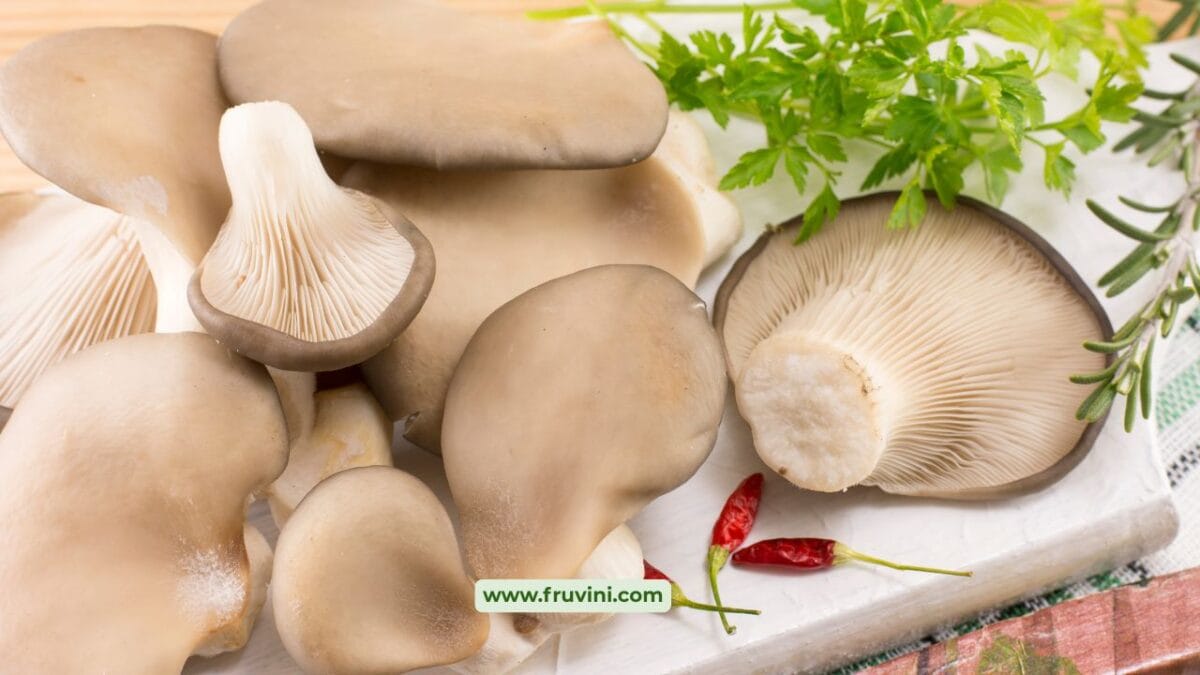
Oyster mushroom cultivation is the process of growing oyster mushrooms using organic materials like straw, sawdust, or agricultural waste under controlled conditions. If you’re following this oyster mushroom cultivation guide, this is the first concept you need to understand.
Unlike traditional farming, oyster mushrooms do not grow in soil or require direct sunlight. Instead, they grow on a nutrient-rich material called a substrate. This makes them ideal for indoor farming, where temperature, humidity, and airflow can be easily managed.
The process begins by adding mushroom spawn (similar to seeds) to the prepared substrate. Over time, the mycelium (a white, root-like network) spreads throughout the material. Once fully developed, it starts producing mushroom clusters that are ready for harvest.
One of the biggest advantages of oyster mushroom cultivation is its simplicity. It doesn’t require advanced farming skills, and with the right steps, even beginners can successfully grow mushrooms at home or on a small scale.
Benefits of Oyster Mushroom Farming
If you’re following this oyster mushroom cultivation guide, understanding the benefits will help you see why it’s one of the best options for beginners. Oyster mushroom farming is simple, cost-effective, and offers quick returns compared to many other crops.
1. Low Investment and Easy Setup
Oyster mushroom farming doesn’t require heavy investment.
- Can start with ₹1,500–₹5,000
- No need for land or expensive equipment
- Uses simple materials like straw and plastic bags
👉 Ideal for beginners with limited budget
2. Requires Very Little Space
You don’t need a farm to grow mushrooms.
- Can be grown in a room, balcony, or small area
- Vertical farming increases production
- Perfect for urban and home setups
3. Fast Growth and Quick Harvest
Oyster mushrooms grow quickly compared to other crops.
- Ready to harvest in 20–25 days
- Multiple harvests (flushes) per cycle
- Faster return on investment
👉 Quick results keep beginners motivated
4. High Nutritional and Market Value
Oyster mushrooms are highly nutritious and widely consumed.
- Rich in protein, vitamins, and antioxidants
- Growing demand in homes and restaurants
- Good selling price in local markets
5. Eco-Friendly and Sustainable Farming
Mushroom farming supports sustainable agriculture.
- Uses agricultural waste as substrate
- Produces minimal environmental impact
- Promotes recycling of organic materials
Key Takeaway
Oyster mushroom farming is one of the easiest and most practical ways to start your journey in agriculture. With low cost, quick results, and strong demand, it offers a perfect balance of simplicity and profitability.
Types of Oyster Mushrooms You Can Grow
As you follow this oyster mushroom cultivation guide, it’s important to know that oyster mushrooms come in different varieties. Each type has slightly different growing conditions, appearance, and market appeal.
Here are the most common types you can grow in India:
Pearl Oyster Mushroom (White Oyster)
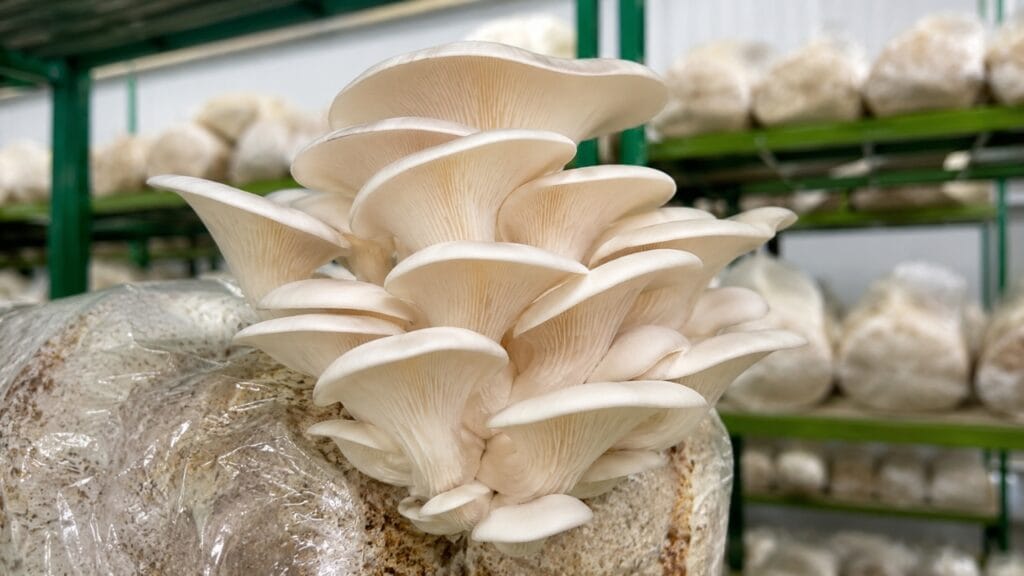
This is the most widely grown and beginner-friendly variety.
- Easy to cultivate
- Grows well in moderate temperatures
- High demand in markets
👉 Best choice for beginners starting out
Grey Oyster Mushroom
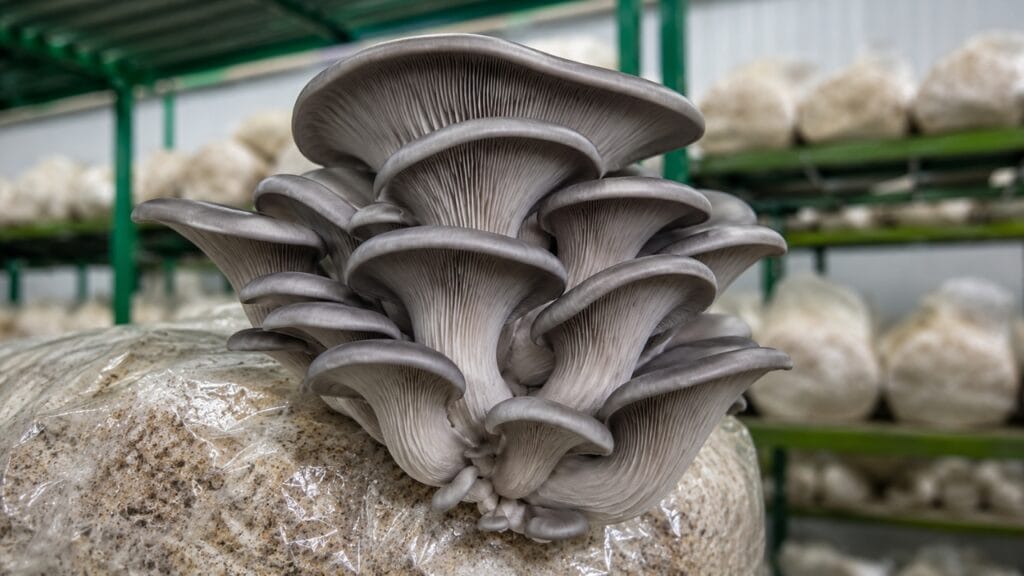
A popular variety known for its adaptability and good yield.
- Strong growth and high productivity
- Suitable for a wide range of climates
- Slightly more robust than white oyster
Pink Oyster Mushroom
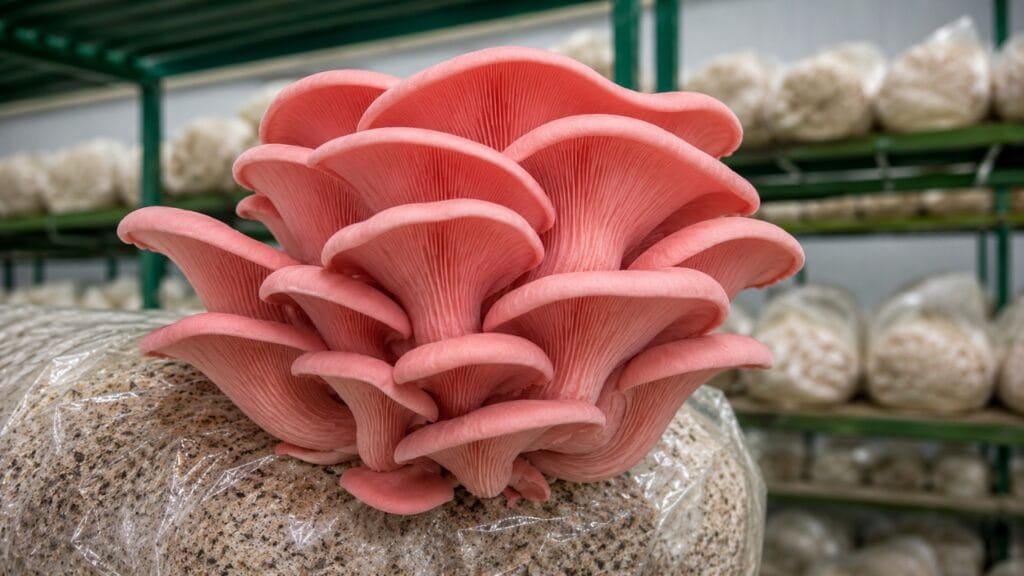
Known for its vibrant color and fast growth.
- Grows well in warm temperatures
- Very fast growth cycle
- Attractive appearance (good for niche markets)
👉 Great for warm regions and quick harvests
Yellow Oyster Mushroom
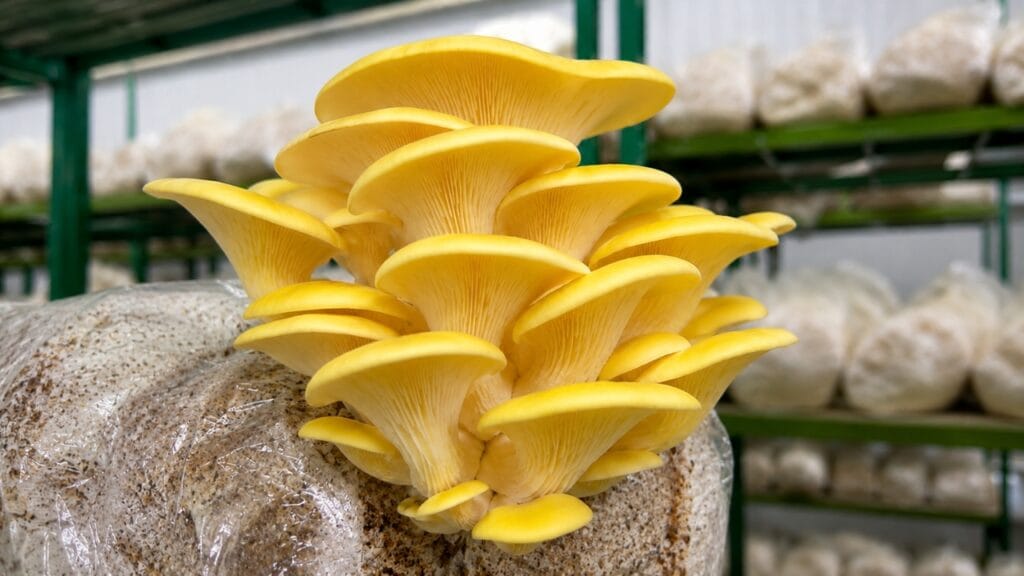
A visually appealing variety with a slightly delicate nature.
- Bright yellow color
- Grows best in controlled environments
- Moderate yield compared to others
👉 Suitable for specialty or premium markets
Quick Comparison
| Type | Difficulty | Climate Suitability | Growth Speed | Market Demand |
|---|---|---|---|---|
| Pearl (White) | Easy | Moderate | Fast | High |
| Grey | Easy | Flexible | Fast | High |
| Pink | Easy | Warm | Very Fast | Medium |
| Yellow | Medium | Controlled | Moderate | Niche |
Key Takeaway
For beginners, pearl and grey oyster mushrooms are the safest and most reliable choices. As you gain experience, you can experiment with pink and yellow varieties for higher market value and variety.
Basic Requirements for Oyster Mushroom Cultivation
To successfully follow this oyster mushroom cultivation guide, you need to create the right growing environment. The good news is that oyster mushrooms are very adaptable and don’t require complex setups—just the right balance of conditions.
Temperature and Humidity
Oyster mushrooms grow best in controlled environmental conditions.
- Ideal temperature: 20–30°C
- Humidity: 70–90%
- Maintain moisture using a spray bottle
👉 Consistent humidity is key for good yield
Light and Ventilation
Mushrooms don’t need direct sunlight but do need fresh air.
- Indirect or low light is sufficient
- Proper ventilation prevents poor growth
- Avoid completely closed spaces
Space and Setup
You can grow oyster mushrooms in a small indoor space.
- Use a room, balcony, or shed
- Arrange bags on racks or hang them
- Keep the area clean and organized
👉 Vertical setup helps maximize production
Hygiene and Cleanliness
Cleanliness is critical for successful cultivation.
- Always use clean hands and tools
- Avoid dust, mold, and contamination
- Keep the growing area sanitized
👉 Poor hygiene is the most common reason for failure
Key Takeaway
You don’t need a complicated system—just maintain the right temperature, humidity, airflow, and cleanliness, and oyster mushrooms will grow efficiently.
Materials Required for Oyster Mushroom Farming
To follow this oyster mushroom cultivation guide, you only need a few basic materials. Most of these are low-cost and easily available, which makes oyster mushroom farming ideal for beginners.
Here’s what you’ll need:
1. Mushroom Spawn (Seed Material)
Spawn is the starting point of mushroom cultivation.
- Acts like seeds in farming
- Determines yield and success rate
- Must be fresh and high quality
👉 Always buy from a trusted source
2. Substrate (Growing Medium)
Oyster mushrooms grow on organic materials, not soil.
- Common options: wheat straw, rice straw, sawdust
- Needs to be cleaned and pasteurized
- Provides nutrients for growth
3. Plastic Bags or Containers
Used to hold the substrate and spawn mixture.
- Transparent plastic bags are commonly used
- Small holes allow mushrooms to grow
- Easy to manage and space-efficient
4. Water Spray Bottle
Maintains the humidity required for growth.
- Spray lightly to keep moisture levels high
- Avoid overwatering
👉 Humidity control is essential for good yield
5. Basic Tools (Optional but Useful)
These tools help improve consistency and results.
- Thermometer (temperature monitoring)
- Hygrometer (humidity tracking)
- Racks or shelves (for vertical farming)
Key Takeaway
Oyster mushroom farming doesn’t require expensive equipment. With just a few basic materials, you can easily start growing mushrooms at home and scale later as needed.
Step-by-Step Oyster Mushroom Cultivation Guide
Now let’s go through the exact process in this oyster mushroom cultivation guide. Follow these steps carefully, and you can successfully grow oyster mushrooms at home—even as a beginner.
Step 1: Prepare the Substrate
The substrate is the food source for mushrooms.
- Cut straw into small pieces (3–5 cm)
- Soak it in clean water for several hours
- Remove excess water
👉 Proper preparation improves growth
Step 2: Pasteurization (Sterilizing the Substrate)
This step removes harmful bacteria and contaminants.
- Soak straw in hot water (60–80°C) for 30–60 minutes
- Let it cool before use
👉 Essential to prevent contamination
Step 3: Inoculation (Adding Mushroom Spawn)
Now introduce the spawn into the substrate.
- Mix or layer spawn with substrate inside bags
- Ensure even distribution
- Maintain cleanliness
👉 This is where growth begins
Step 4: Fill and Prepare the Bags
Prepare the bags for incubation.
- Fill bags tightly and tie them
- Make small holes for airflow and growth
- Arrange on racks or hang them
Step 5: Incubation Stage (Mycelium Growth)
This is the development phase.
- Keep bags in a dark, warm place
- Maintain temperature around 20–30°C
- Wait for 10–15 days
👉 Bags turn white when fully colonized
Step 6: Fruiting Stage (Mushroom Growth)
Mushrooms start to grow in this stage.
- Move bags to light and ventilated area
- Spray water regularly to maintain humidity
- Small mushrooms (pinheads) will appear
Step 7: Harvesting
Your mushrooms are ready to harvest within a few days.
- Harvest when caps are fully open
- Twist gently or cut with a clean knife
- Expect multiple harvests (flushes)
Key Takeaway
Oyster mushroom cultivation is simple when you follow the process step by step. Focus on cleanliness, consistency, and proper conditions, and you’ll get reliable results.
Common Problems and Solutions in Oyster Mushroom Cultivation
Even if you follow this oyster mushroom cultivation guide, you may face some common issues during the growing process. The key is to identify problems early and fix them quickly to avoid losses.
1. Contamination (Mold or Bacterial Growth)
Problem: Green, black, or unusual patches on the substrate
Cause: Poor hygiene or improper pasteurization
Solution:
- Always pasteurize substrate properly
- Maintain clean hands and tools
- Remove contaminated bags immediately
👉 Prevention is easier than cure
2. Slow or No Growth
Problem: Mycelium spreads slowly or stops growing
Cause: Low-quality spawn or incorrect temperature
Solution:
- Use fresh, high-quality spawn
- Maintain temperature between 20–30°C
- Keep proper moisture levels
3. Drying of Substrate
Problem: Substrate becomes dry, affecting growth
Cause: Low humidity or irregular watering
Solution:
- Spray water regularly (light misting)
- Maintain humidity around 70–90%
- Avoid direct airflow drying the bags
4. Small or Deformed Mushrooms
Problem: Mushrooms are thin, small, or oddly shaped
Cause: Poor ventilation or lack of fresh air
Solution:
- Improve airflow in the growing area
- Avoid completely closed spaces
- Ensure proper light and oxygen
5. Low Yield
Problem: Fewer mushrooms than expected
Cause: Poor conditions, weak spawn, or inconsistent care
Solution:
- Maintain stable environment
- Use quality materials
- Monitor daily and adjust conditions
Key Takeaway
Most problems in oyster mushroom cultivation come from inconsistent conditions or poor hygiene. Fixing these basics can dramatically improve your success rate and yield.
Cost of Oyster Mushroom Cultivation
If you’re following this oyster mushroom cultivation guide, one of the biggest advantages is the low startup cost. You don’t need heavy investment to begin—you can start small and scale gradually.
1. Small-Scale Setup Cost (Beginner Level)
This is ideal for beginners starting at home.
- Mushroom spawn: ₹80 – ₹150 per kg
- Straw/substrate: ₹20 – ₹50 per kg
- Plastic bags: ₹2 – ₹5 per bag
- Spray bottle: ₹100 – ₹300
- Miscellaneous: ₹300 – ₹1000
👉 Total cost: ₹1,500 – ₹5,000 (approx.)
2. Cost Per Growing Cycle
Recurring costs for each production cycle:
- Spawn and substrate
- Water and electricity
- Basic maintenance
👉 Estimated cost per cycle: ₹1,000 – ₹3,000 (small setup)
3. Cost-Saving Tips for Beginners
- Use locally available straw or agricultural waste
- Start with fewer bags and scale gradually
- Avoid unnecessary equipment initially
- Reuse materials where possible
👉 Smart cost control improves overall profit
Reality Check (Important)
Oyster mushroom farming is low-cost—but not zero effort.
- Requires daily monitoring
- Mistakes can reduce yield
- Learning phase may not be highly profitable
👉 Focus on learning first, profit will follow
Key Takeaway
Oyster mushroom cultivation is one of the most affordable ways to start farming. With minimal investment, you can gain experience and build a scalable income source over time.
Related Reading: Mushroom Farming Cost & Profit in India (Full Breakdown)
Yield and Profit Potential
To complete this oyster mushroom cultivation guide, you need to understand how much you can produce and earn. Yield and profit depend on your setup, consistency, and how well you manage growing conditions.
1. Expected Yield from Oyster Mushroom Farming
Yield is directly linked to the quality of spawn and care.
- 1 kg spawn → 2–3 kg mushrooms
- Multiple harvests (2–3 flushes per cycle)
- First flush gives highest output
👉 Better conditions = higher yield
2. Selling Price of Oyster Mushrooms in India
Prices vary based on location and demand.
- ₹120 – ₹250 per kg (average market range)
- Higher prices in urban or direct selling markets
- Premium varieties may fetch more
3. Profit Example (Small-Scale Setup)
- 5 kg spawn → 10–15 kg mushrooms
- Selling at ₹150/kg → ₹1,500 – ₹2,250 revenue
- After costs → ₹500 – ₹1,500 profit per cycle
👉 Good for steady side income
4. Factors That Affect Profit
- Quality of spawn
- Temperature and humidity control
- Hygiene and contamination prevention
- Selling method (direct vs middlemen)
👉 Small improvements can increase profit significantly
Key Takeaway
Oyster mushroom farming offers a good balance of low investment and steady returns. Even small setups can generate consistent income if managed properly.
👉 Profit grows with experience and consistency
Tips to Increase Oyster Mushroom Yield
If you want to get the best results from this oyster mushroom cultivation guide, focus on improving your yield. Higher yield means more mushrooms from the same investment—and better profit.
1. Maintain Consistent Humidity
Humidity plays a crucial role in mushroom growth.
- Keep humidity between 70–90%
- Spray water regularly (light misting)
- Avoid letting the substrate dry out
👉 Inconsistent moisture reduces yield
2. Use High-Quality Mushroom Spawn
Spawn quality directly affects production.
- Always use fresh and reliable spawn
- Strong mycelium = faster and better growth
- Poor spawn leads to low yield or failure
👉 This is your most important input
3. Ensure Proper Ventilation
Fresh air improves mushroom size and quality.
- Avoid closed, suffocating spaces
- Allow airflow without strong wind
- Prevents long stems and small caps
4. Monitor Temperature Daily
Temperature fluctuations can slow growth.
- Keep it within 20–30°C
- Avoid sudden changes
- Use simple monitoring tools
5. Harvest at the Right Time
Proper timing improves both yield and quality.
- Harvest when caps are fully open
- Avoid late harvesting (reduces quality)
- Regular harvesting encourages more flushes
6. Maintain Clean Growing Conditions
- Prevent contamination at all stages
- Use clean tools and hands
- Remove infected bags quickly
👉 Clean environment = consistent production
Key Takeaway
Increasing yield is not about doing more—it’s about doing the basics consistently right. Focus on humidity, spawn quality, and environment control, and your production will improve naturally.
Conclusion
Following this oyster mushroom cultivation guide, you can clearly see that growing oyster mushrooms is one of the easiest and most practical ways to start mushroom farming at home. With low investment, simple setup, and fast results, it offers a perfect opportunity for beginners to learn and earn at the same time.
The key to success lies in doing the basics right—maintaining proper humidity, using quality spawn, ensuring cleanliness, and staying consistent with your process. Your first cycle may not be perfect, but each attempt will improve your skills and results.
Whether you want to grow mushrooms for personal use or build a small business, oyster mushroom cultivation gives you a strong starting point with minimal risk and good potential returns.
👉 Start small, learn the process, and scale gradually—that’s how you build success in mushroom farming.
FAQs on Oyster Mushroom Cultivation
How long does oyster mushroom cultivation take?
Oyster mushrooms typically take 20–25 days from setup to harvest, depending on conditions.
Is oyster mushroom farming profitable?
Yes, it can be profitable due to low investment and steady demand, especially when managed properly.
Can I grow oyster mushrooms at home?
Yes, oyster mushrooms can be easily grown at home using a small room, balcony, or indoor setup.
What temperature is best for oyster mushrooms?
The ideal temperature range is 20–30°C, with humidity between 70–90%.
How much yield can I expect?
On average, 1 kg of spawn can produce 2–3 kg of mushrooms under good conditions.
Leave a Reply